I don’t know about you, but for me there’s an anticipation, and desire, and certain amount of fear that comes from a first kiss that can’t be match by many other things in life. Ironically enough, I go through the same gambit of emotions when I learn a new technique or knit a new pattern. I recently joined the Multi-Directional knitting group on Yahoo and was presented with a scarf pattern that gave me the opportunity to experience this again. You may remember the post I did about beaded knitting that talked about the Russian Join. I had done research on it and know how to do it, but I had never applied it in my knitting before now. Making the scarf was the perfect opportunity to try out this technique and also to try a new method of creating a multi-directional piece of fabric. The pattern is not mine but I am sure you can get a copy of it when/if you join the group on Yahoo. All you have to do is sign in with your Yahoo ID (they’re easy to create if you don’t have one – just go to yahoo.ca) and do a search for “multidirectional knitting”. I am certain you will enjoy being a member there and experiencing the wonderful ways you can make multi-directional knitted garments. Some methods (like the one I’m doing now) use a variation of short rows and others you end rows and pick up stitches along the way (like entre-lac), or simply knit on the bias. Either way(s), the techniques are fun and the finished products are spectacular. Even better still is using variegated or hand-painted yarns for this technique. When you do this the yarn ends up looking even better than it did on the skein.
As for the Russian Join, I decided to use this method to join the yarn when I got to a new ball because I didn’t want to interrupt the natural flow of the color variances in the yarn. By doing the join, I could find another ball of yarn right where I wanted to and join them almost invisibly in the work. I say almost because if you use a magnifying glass you could probably find the joins, but they are virtually invisible unless you know where they are. Add the fact that I’m using a variegated yarn in a darker shade and I would challenge you to find the joins. So how exactly do you do the Russian Join? Well, here’s a link to a video on YouTube that will show you, but I’ll describe it here as well.
- You will need a darning needle – the smaller the better – that the yarn can be thread through. Using about a 6″ tail, thread the yarn from the ball you’re working on through the darning needle. Working back on itself, thread the darning needle through the middle of the yarn for about 2 – 3 inches. It’s important to stay as close to the middle of the yarn as possible. You should have a loop at the end of the yarn.
- Carefully pull the darning needle out of the yarn carrying the end of it through as well. Be careful not to lose the loop you created in step 1.
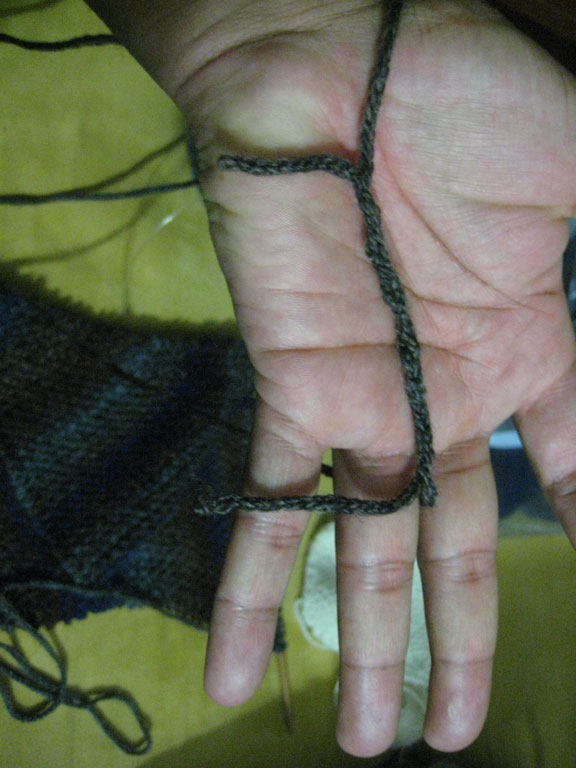
- Thread the darning needle through the new ball of yarn and then through the loop you made in step 1. Now repeat the technique from step 1 and 2 where you thread the needle through the yarn and out again. This time you don’t have to worry about saving the loop.
- Remove the darning needle and holding both strands of yarn, give a pull until you feel the yarn taught between your fingers. Your join is finished and you’ll notice two little ends sticking out of your yarn. I leave these until I am finished and then snip them later, but you can snip them now if you want to.


Where there were 2, there is now 1!
- The join with the new strand through the first.
Here is the link for the YouTube video – Russian Join. The great thing about this join is you can use it when other methods like spit-felting won’t work and later you won’t have any ends to sew in. I hope you have a good time with it – just like that first kiss, and all the ones after it!
Hugzzz 😎