Shadow Knitting may be new to you, but I assure you it’s been around for awhile. I myself have done a few posts on it in the past, and there’s lots of information about it all over. There’s books (search Vivian Hoxboro), groups (check Ravelry), and videos (look on You Tube). This post is about breaking it down a bit and hopefully giving you the courage to try it yourself. It’s an extremely simple thing to do once you make a chart as it’s only knits and purls. It can be done in 1 or 2 colors (or more if you want to get complex) but 2 contrasting colors work best.
In a nutshell, shadow or illusion knitting uses the natural texture of stocking and reverse stocking stitch to hide or show a specific graphic in a piece of fabric. It takes advantage of the fact that reverse stocking stitch creates a raised bump or “hill” in your fabric while stocking stitch creates a sunken smooth texture, or “valley”. By creating these textures in specific points in your work and using different colors to accentuate this, you can create illusions in your work! I say illusions (even though they really aren’t) because they are not always visible! Depending on the angle you view the work at, you either see stripes or the graphic! Hence the name Illusion Knitting.
So how do we create Illusions in our knitting? Well, that’s the trick, isn’t it? Except, it’s not that tricky at all. I’ve been working on a Valentine’s Day scarf that I’ll share with you soon, but I’ll take you through the process of doing a simple graphic – well, the chart part of it anyway.
There are a few simple rules that make this work. Follow them and you’ll have no troubles at all.
1. There are 4 rows of knitting for every row of pattern. This means that your work will be 4x as wide or high as it appears when just the graphic is charted. This is important to know when considering the finished size of the overall project. This is also important when deciding on the weight of the yarn you’re going to use, especially when you incorporate the amount of detail in the graphic. This sounds complex, but we’ll be gentle and start with a simple graphic.
2. All the “magic” is created on the reverse side of the work – rows 2 and 4. If you remember this you’ll be able to do this without charting every row of your project. Rows 1 and 3 are always knit across the entire row, first in the background color, then in the pattern color.
3. The pattern is always purled in the background color and knit in the pattern color. If you think about the nature of stitches and rule #2, you’ll realize that a knit stitch on the reverse side is a purl stitch on the right side. Purl stitches are raised, hence, knitting the pattern on the reverse side gives us a raised stitch on the right side, accentuating the pattern. Much the same way that we usually place purl stitches beside cable patterns, the background color is knit on the reverse side, raising it on the right. This is what “hides” the raised pattern as it provides “edges”, forcing you to look at angles to see what lies in between.
Okay, enough talk. Let’s try this out. Here’s my graphic that I’m going to use – I think you’ll recognize it!
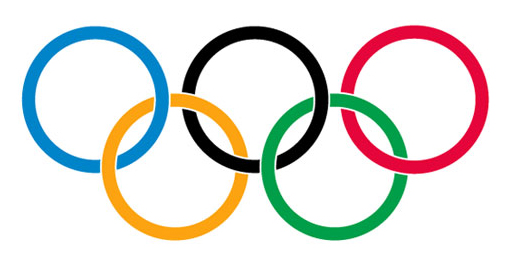
I know it doesn’t look simple, but it will be in 1 color. So to increase the contrast, let’s make this in black and have the background be white. You can choose any 2 colors you like, but the higher the contrast the better.
Now in the past, you’d have to convert this graphic to a chart, probably by using a program like Microsoft Excel. Now, thanks to the good will of people and the availability of the internet, you can import graphics into this program and get the chart produced for you – in 3 different sizes to boot! Here’s the program link – KnitPro. If you end up using this program to create charts for your own shadow knitting designs, please send them a donation to say thank you! 🙂
And here’s the chart I get when I import the graphic …
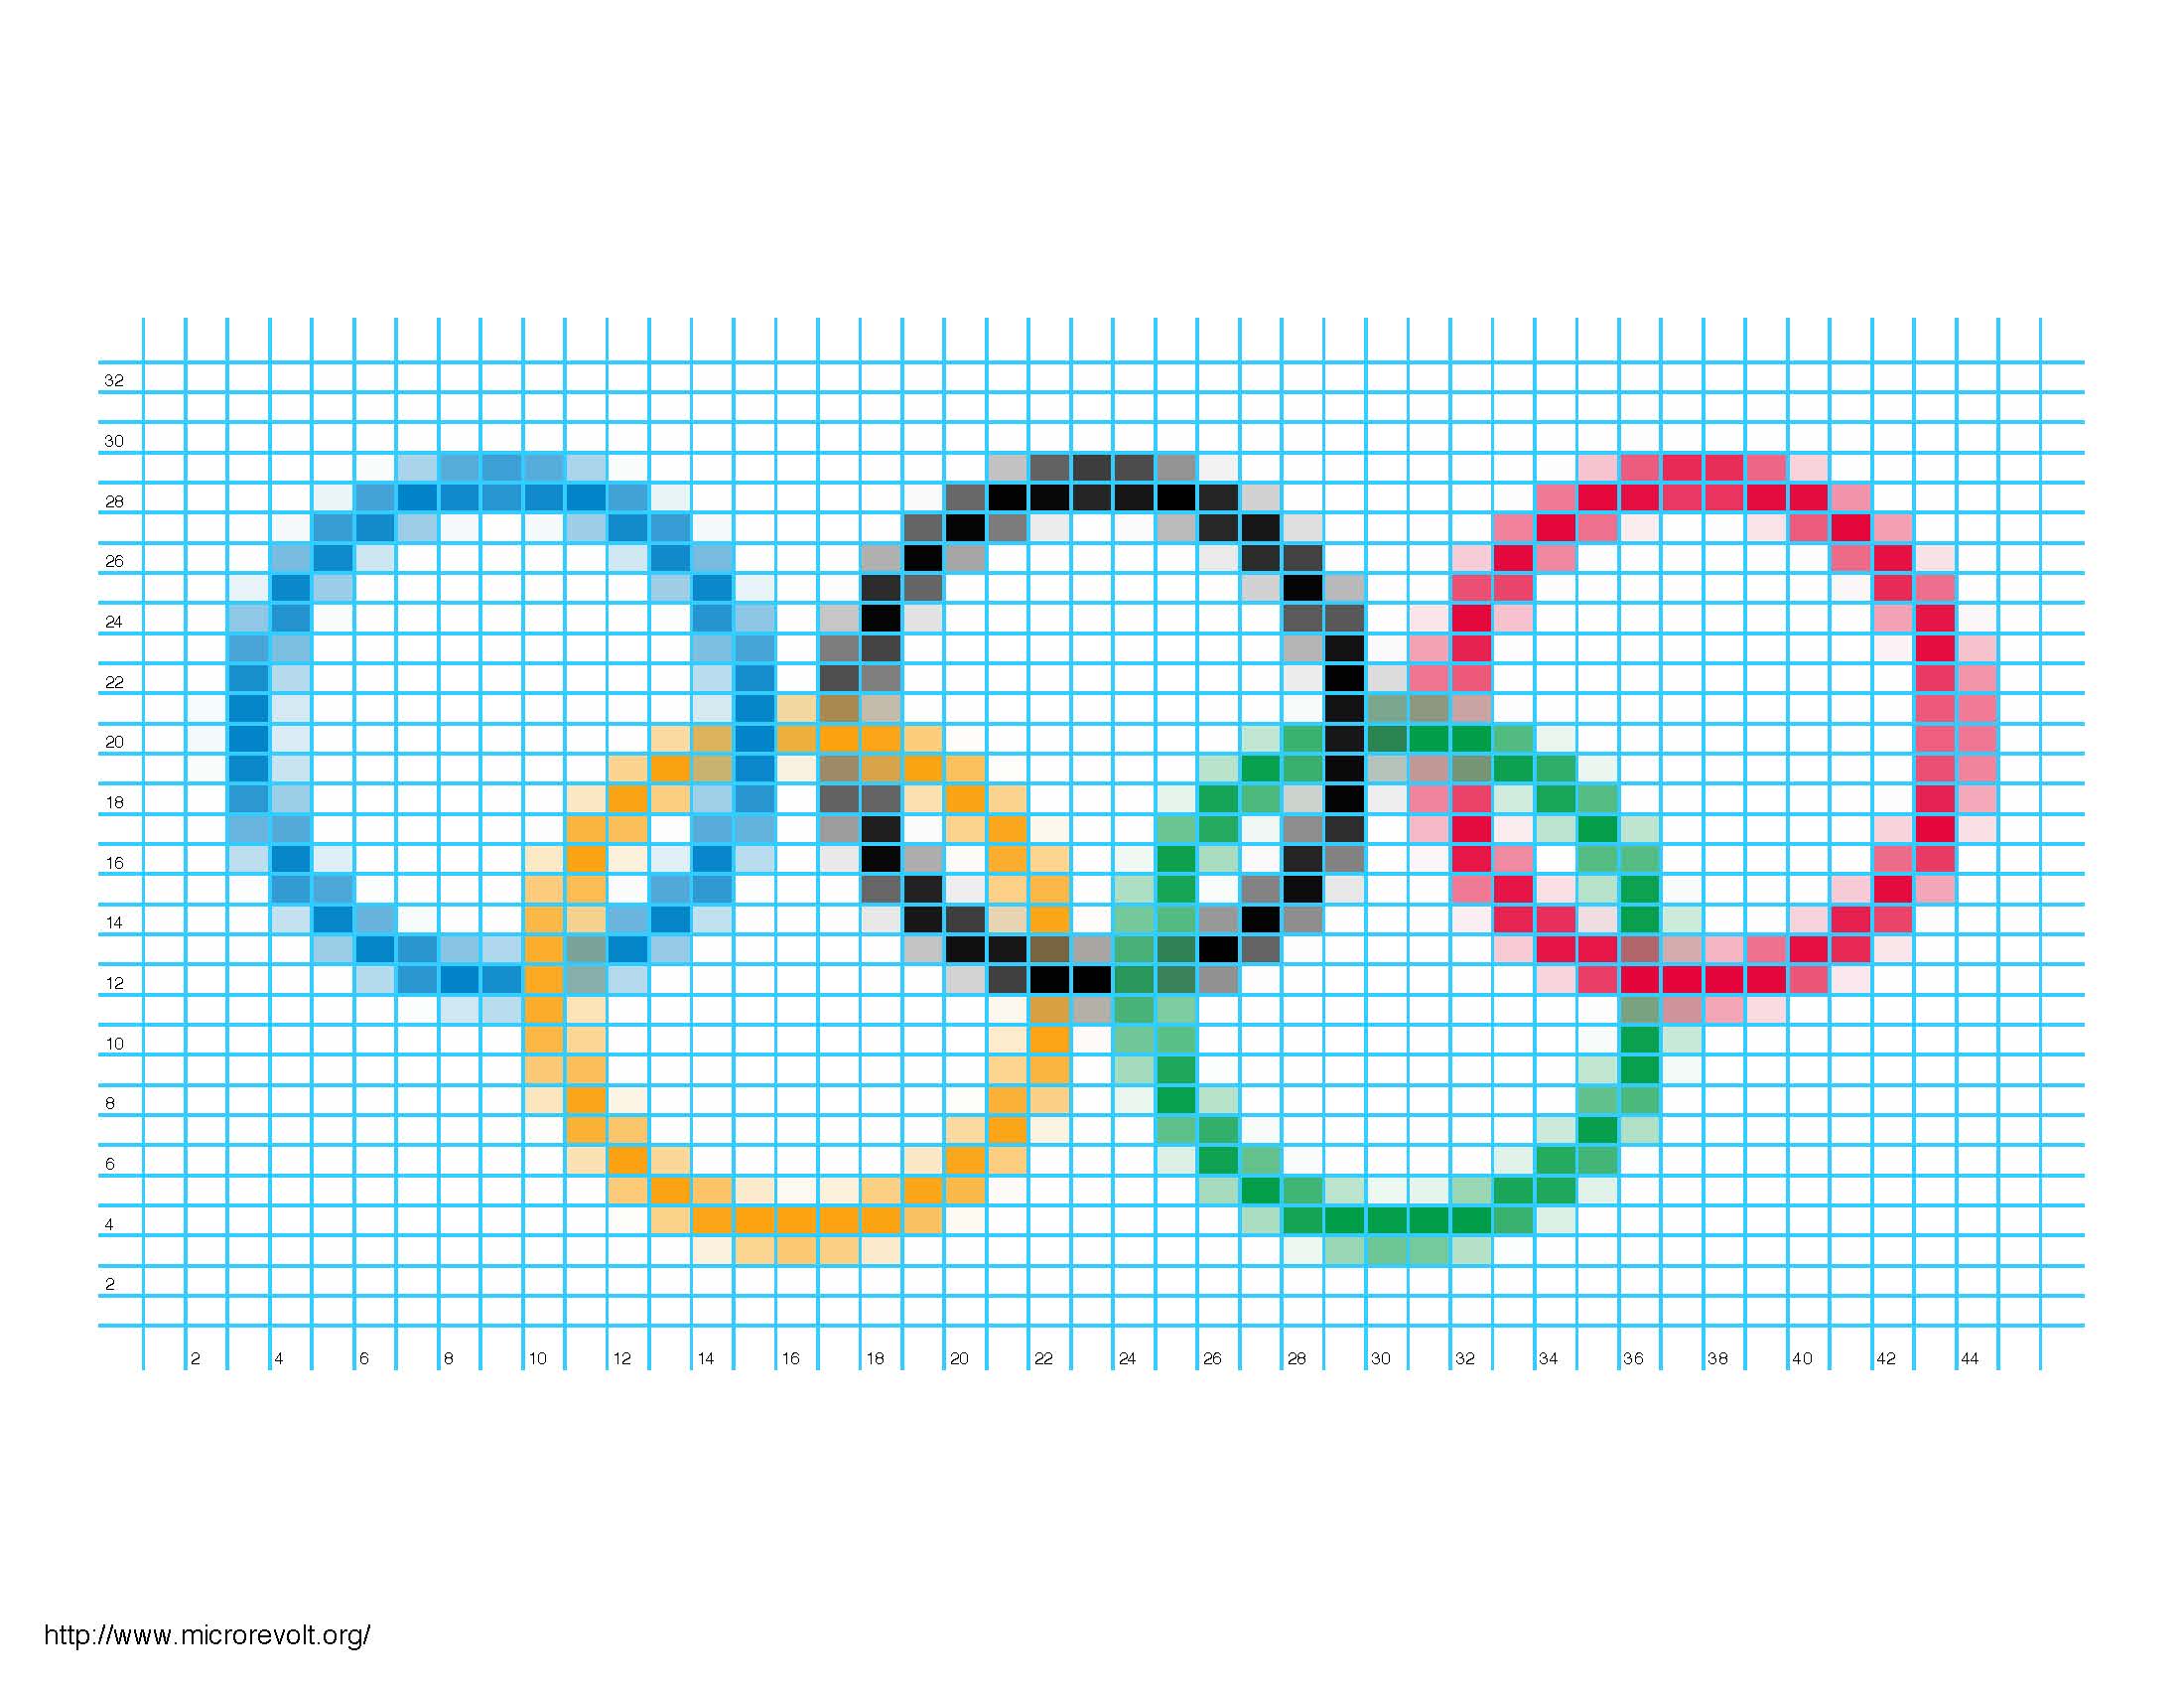
As you can see, the chart is 32 rows high x 46 stitches wide. If you knit this in this orientation, those 32 rows become 128 and the work will be 4 times higher than it currently is.
I’m going to rotate it 90 degrees however, and so my stitches become rows and my rows become stitches. I will then be left with a graphic 32 stitches wide and 46 rows high. It will look like this …
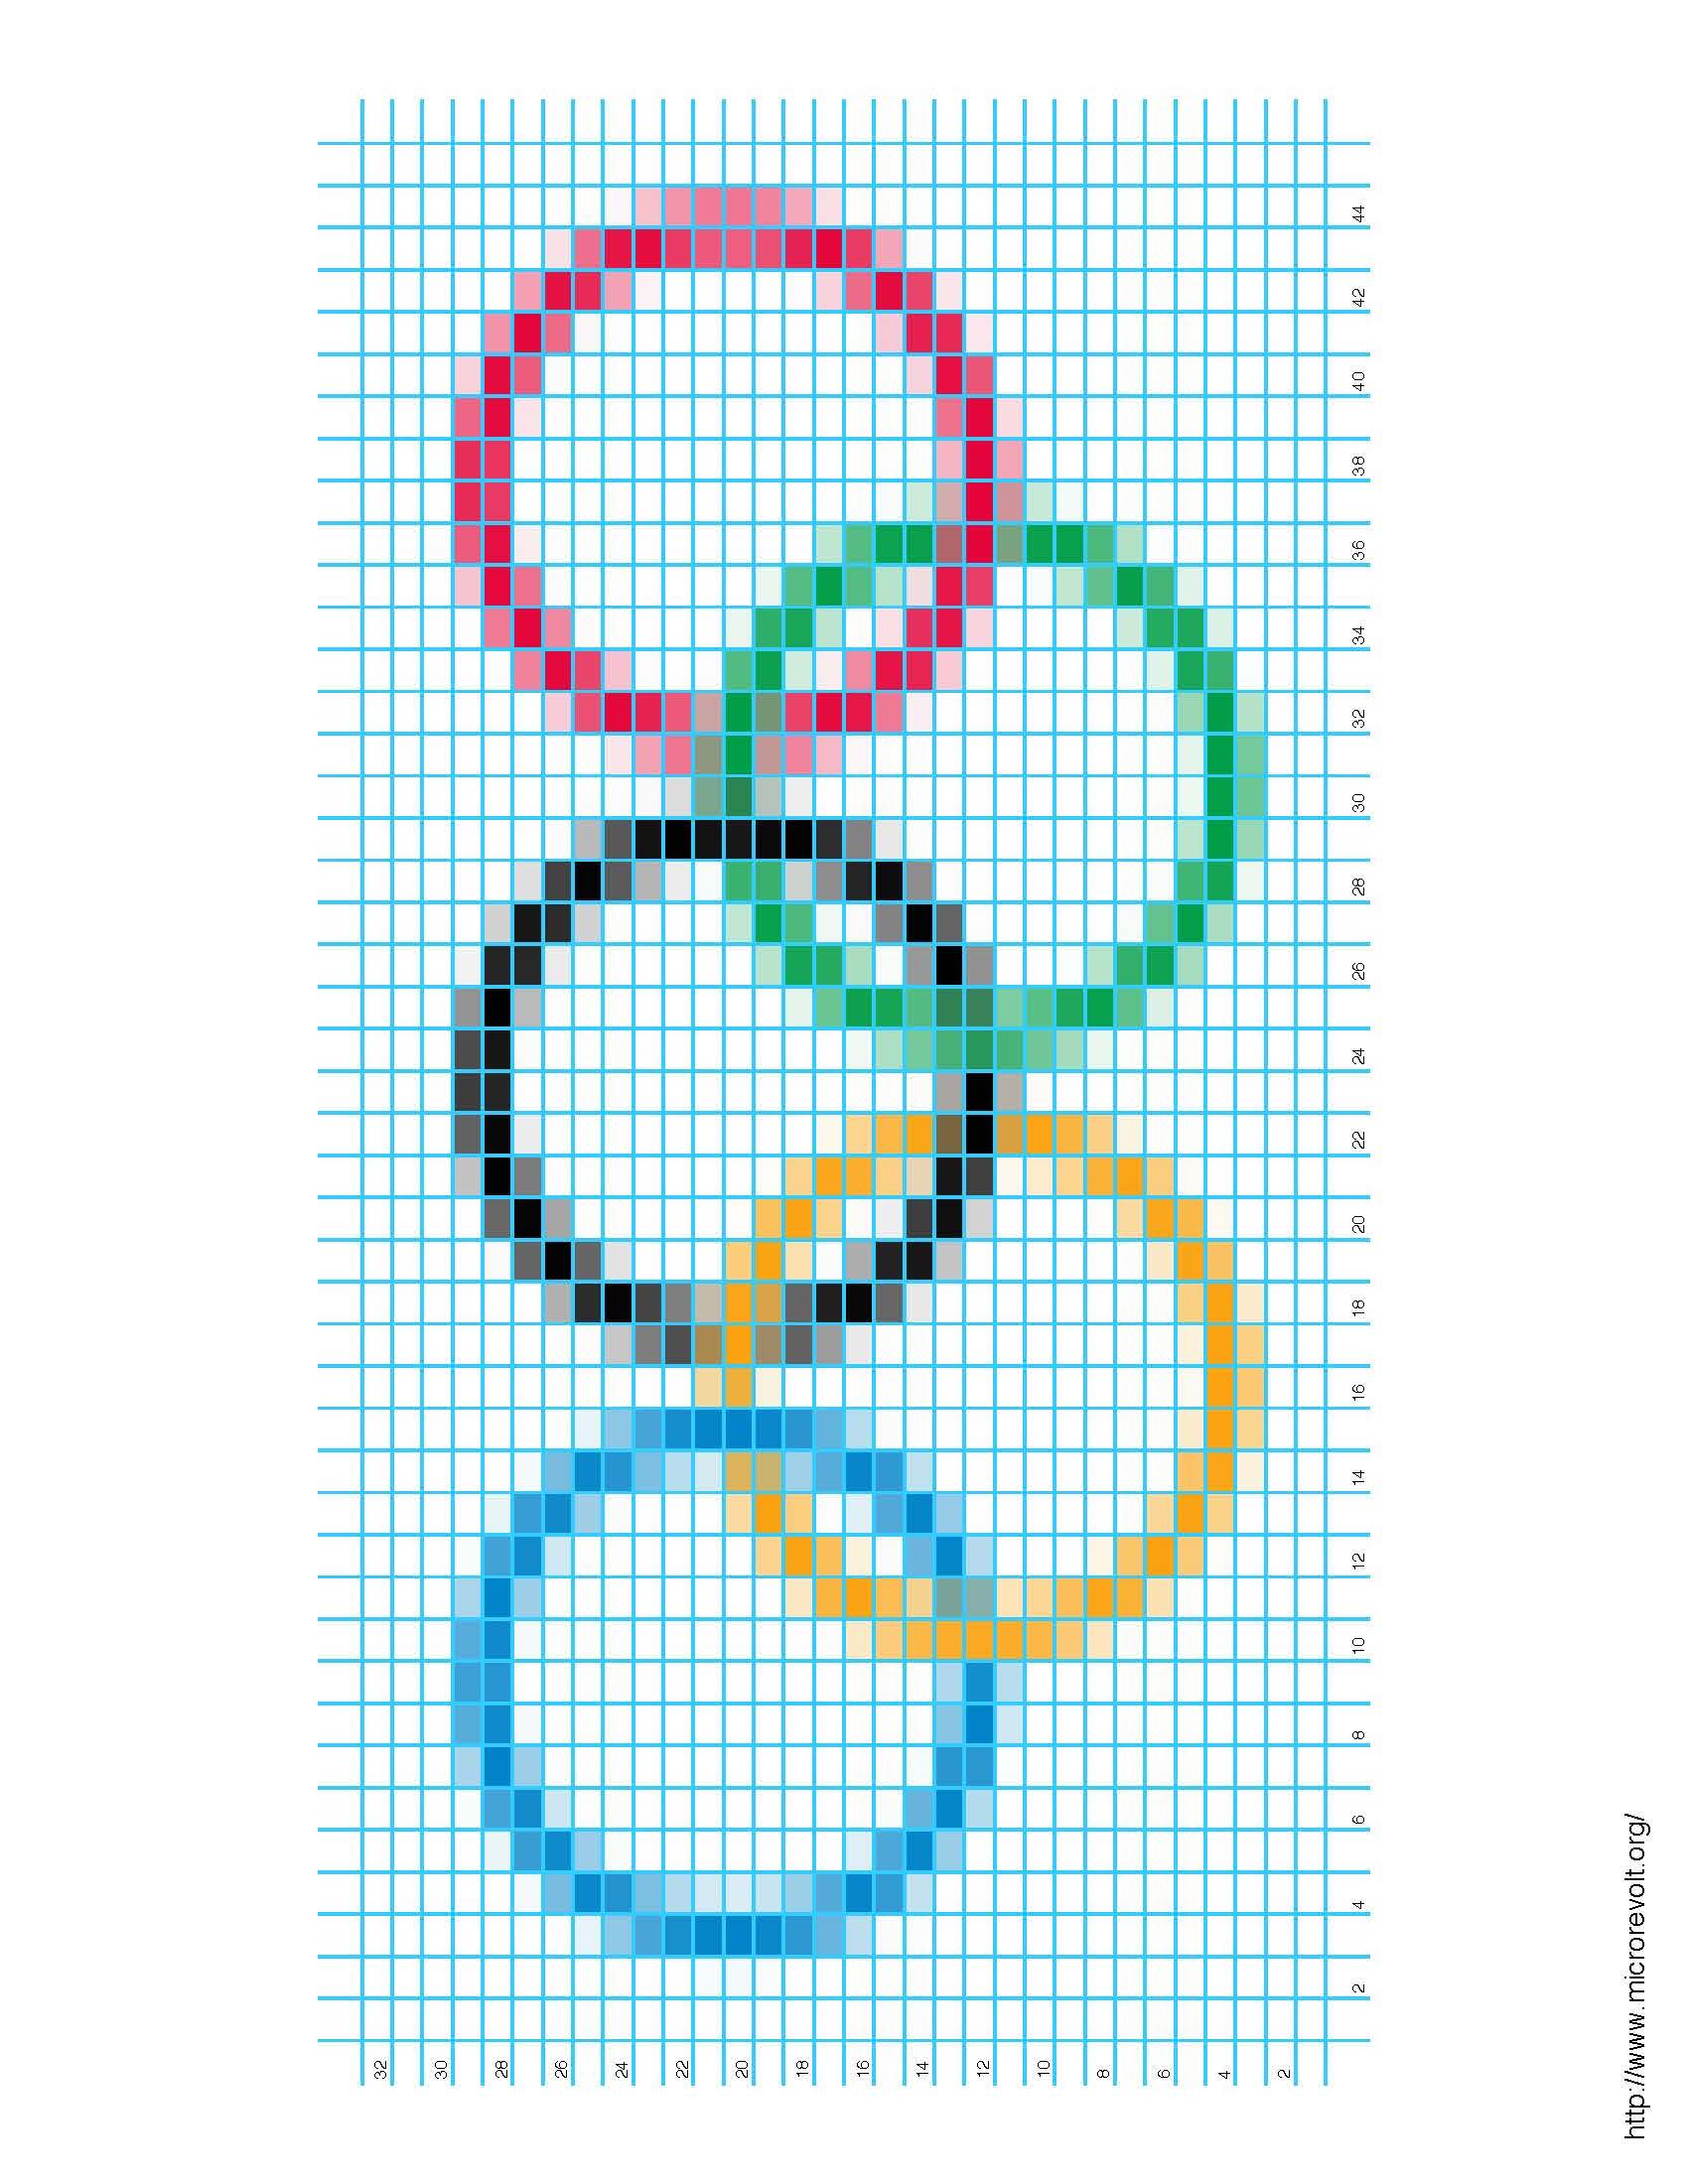
When I convert it I will have 184 rows instead of the 46 I currently have. Remember what I said about size? Well, we’ll delve into why I did this and look at the corresponding chart in the next post. Yeah, I know, I’m a tease! 😉 I might even have some of it knit up to show you. I’m going to use the colors of Jamaica’s flag – black, gold, and green – as a tribute to the bobsled team returning to the Winter Olympics after a 12 year absence!
Hugzzz 😎