Woohoo – we’re getting close! So now you have two tubes with these rectangular flaps hanging off them and you’re wondering what to do – right?Well, believe me when I say that you’re almost there. I know the anticipation is building as you see the socks develop, and I hope you’re tried them on a few times already by now. I know I sure have. So we’re at the point where we have to create the bottom of the heel in our knitting – what’s referred to as turning the heel. Once we do this it will allow us to pick up some stitches and once again work in the round, creating the foot of the sock. Remember in the first or second post of this KAL where you watched the video on the anatomy of the sock? This is the 45 degree “joint” that connects the first tube to the second tube for you sock. Let’s get going.
There are several heel turns out there, but for now I am going to keep this basic. What we will do is an adaption of short rows – we will go partially across a row and turn back, creating a gap. Instead of using wraps to close the gap however (as you would with short rows), we will decrease across the gap in the next row. By repeating this process across the entire flap, we will create a bridge across the width of the flap as we gradually increase the number of stitches in the heel turn. Once this is done and you heel turned, we will be able to pick up stitches around the entire foot and start knitting in the round again.
Okay, first you have to take note of how many stitches you have in your heel flap.
- Slip 1, knit across the flap 2 stitches past the middle stitch (it’s a good idea to place a stitch marker on the middle stitch). Do a SSK decrease, k1, then turn your work. If you were on the reverse side side, you would sl1, purl to 2 stitches beyond middle, p2tog, p1, turn.
- Slip 1, purl to the stitch just before the gap from the row before, p2 tog, p1, turn.
- Sl1, knit to the stitch just before the gap from your row before, ssk to close the gap, k1, turn
- Repeat the last two rows until all the stitches on your heel flap have been used up.
- *Note – you will finish your heel on the opposite side that you started on.
- Place your stitches n a holder and repeat this process for your other sock.

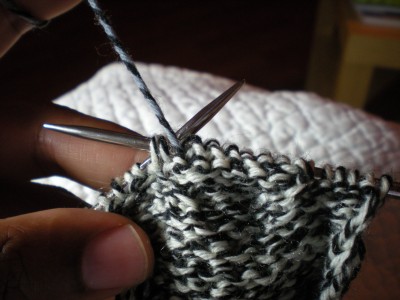
The two needles are showing the gaps created when turning the heel ...

Use an SSK decrease on the knit side ...

... and a p2tog decrease on the purl side to close the gaps ...
You have successfully turned the heels on both your socks. Saturday we will pick up the stitches for the foot and knit the gussets. See you then!
Hugzzz 😎